What the dust cover does
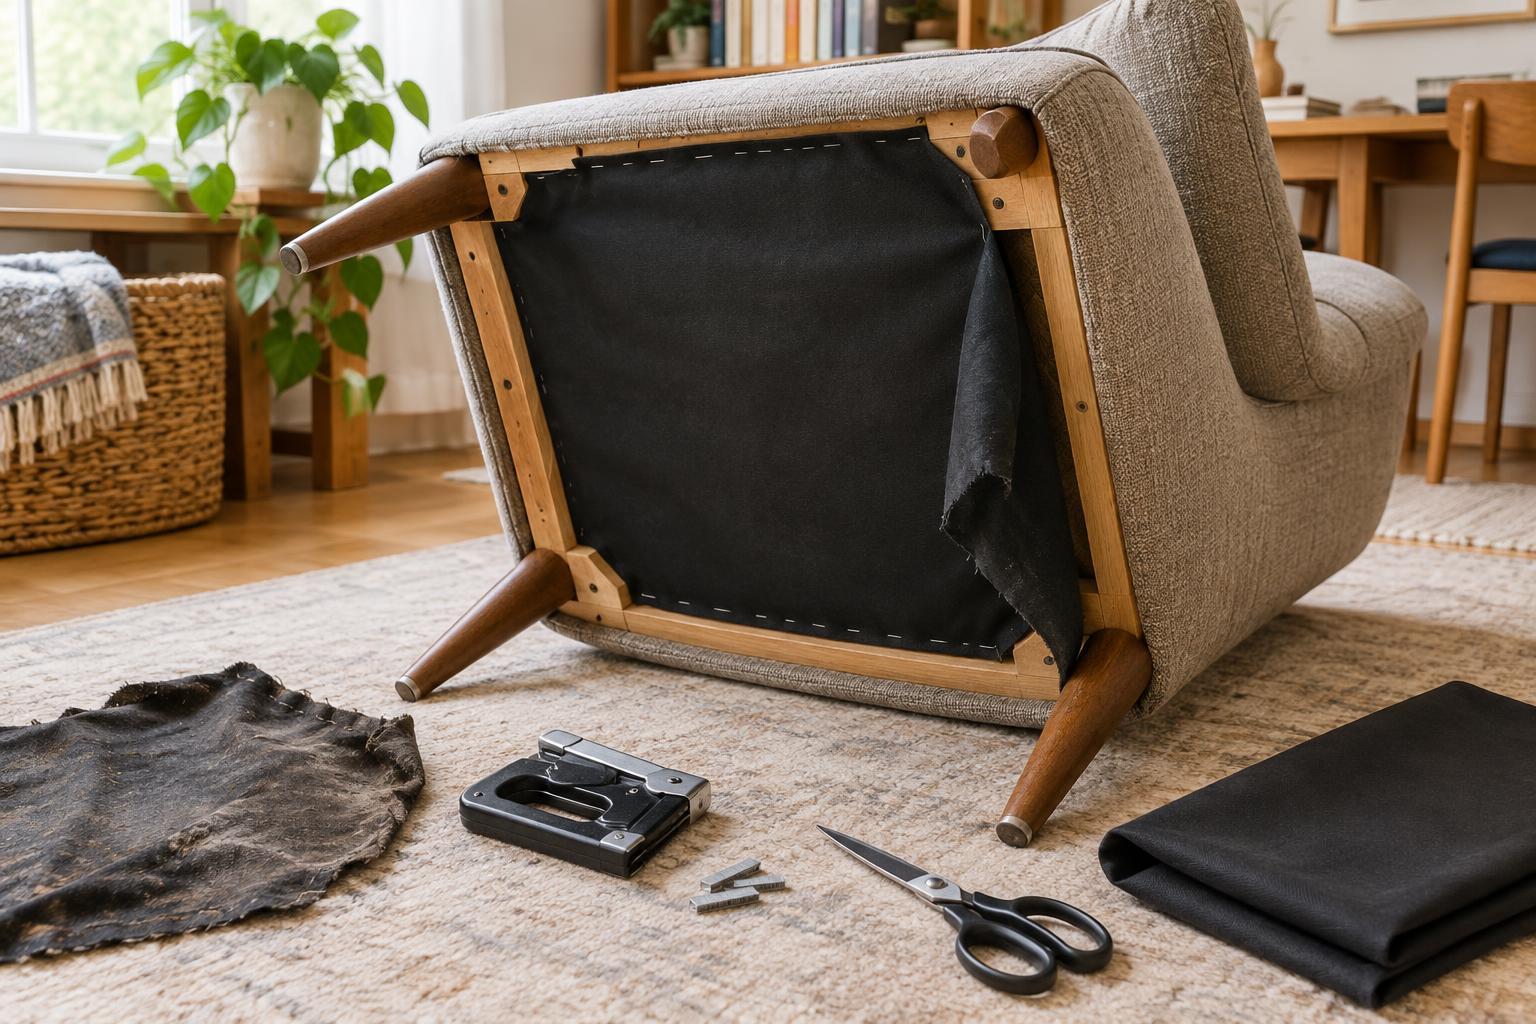
Turn over an upholstered chair and you may find a thin piece of fabric stretched across its underside. Often called a dust cover or cambric, it hides the chair’s inner construction and helps keep loose fibers and dust from dropping out. It is not meant to support the seat. If it has sagged, torn or come away from the frame, replacing it is usually a manageable refresh rather than a full upholstery project.
First, check that the problem really is limited to the cover. A chair that wobbles, has a sagging seat or shows broken webbing or springs needs attention beyond a new piece of underside fabric. A fresh cover should not be used to conceal damage you have not addressed.
Gather materials and inspect the underside
You will need replacement dust-cover fabric, a tape measure, fabric scissors, a staple remover or small flat screwdriver, pliers and a staple gun with staples suited to the chair’s frame. A flashlight helps you see where the old cover is attached. Work on a clean, padded surface so the chair’s arms and back will not be scuffed when you turn it over.
Choose a lightweight, tightly woven fabric intended for upholstery dust covers. It should be wide enough to span the opening in one piece, with extra fabric on every side for fastening. Measure the underside at its widest points before buying or cutting. If the old cover is mostly intact, you can also use it as a rough pattern, but allow for any edges that have stretched or torn.
Look closely at the frame before removing anything. Note where the cover is stapled and whether the legs, corner blocks or hardware interrupt its edge. Identify a firm wooden fastening surface; do not plan to staple into webbing, springs, padding or an adjustable mechanism. If the underside contains moving parts or wiring, keep the new fabric and staples clear of them.
Remove the old cover carefully
Photograph the underside if the original folds are hard to follow. Then lift the staples along one edge of the old cover, working a staple remover or screwdriver gently beneath each one. Pull loosened staples out with pliers and collect them as you go. Wear eye protection, keep your free hand away from the tool’s path and take care around exposed staple points.
Continue around the frame and peel away the cover. Removing all the staples makes it easier to lay the replacement flat; any staple you cannot remove should be set flush so it cannot snag the new fabric. Brush or vacuum loose dust from accessible surfaces without tugging at the chair’s padding or internal supports. This is also a useful moment to check for a split frame rail or other damage that was hidden by the cover.
Cut and fasten the replacement
Lay the new fabric flat and cut it a little larger than the area it must cover. Leave enough margin to grip and fold at each edge; you can trim excess after fastening. Center the fabric over the opening, then place a staple near the middle of one frame rail. Pull the fabric gently toward the opposite rail and staple its midpoint. Repeat on the remaining two sides.
Work outward from the center of each rail, alternating between opposite sides. Keep the fabric smooth and lightly taut, not stretched so hard that it distorts the frame edge or pulls against the staples. Space the staples closely enough to hold the fabric evenly, adding them where an edge wants to lift. Check that every staple goes into solid frame material and does not emerge where it could be touched when the chair is upright.
At each corner, fold the extra fabric into a tidy, flat pleat that follows the frame. Keep folds clear of leg fittings and any screws you may need to reach later. Staple the folds, then trim loose fabric outside the staple line. Do not cut so close that the edge can slip free.
Check the finish and keep it easy to maintain
Before turning the chair back over, run your eyes around the entire perimeter. The cover should lie flat, with no dangling edges, missed corners or loose staples. Press lightly on the center: a little give is normal, but the fabric should not hang down. Make sure it does not rub against a recliner mechanism or cover a label or fitting you need to access.
Put the chair upright and check that it sits steadily. If it still feels unstable or the seat remains noticeably uneven, the dust cover was not the cause. The new fabric can be lifted again if a repair is needed, but it is better to investigate the underlying issue than to rely on the cover to hold anything in place. For routine upkeep, vacuum around the chair and check the underside occasionally for a loose edge before a small tear spreads.