Decide whether darning suits the hole
Darning fills a gap with new yarn, giving the surrounding fabric support. It works best when the hole is small, the knitting around it is sound, and you can reach both sides of the throw. Before you begin, spread the throw on a table and look for loose loops or stitches that have started to run. Do not tug the edges together: that can distort the knitting and make the gap harder to fill.
Check the area around the hole as well. If nearby yarn is thin or breaks with gentle handling, a darn anchored only to that yarn may not last. A larger worn area may need a knitted patch or a more visible reinforcing repair instead. For a throw with a delicate pattern or strong sentimental value, it is reasonable to practice on a spare swatch first.
Gather yarn and prepare the fabric
You will need a blunt tapestry needle, scissors, and repair yarn. Choose yarn close to the throw’s thickness and, if possible, similar in fiber and care requirements. A matching color makes the repair quieter; a contrasting color turns it into a deliberate detail. Avoid yarn so thick that it forms a hard lump, or so fine that the new fabric leaves wide spaces. A removable stitch marker or small safety pin can help hold a loose loop while you work.
Lay the throw flat, with the hole relaxed rather than stretched. If you use a darning mushroom or another smooth, rounded support underneath, keep it loose enough that the surrounding stitches sit naturally. Trim only frayed fibers that are clearly detached. Leave intact loops and short yarn ends in place until you have secured them; they may be helping to hold the edges together.
Secure the edges before filling the gap
Thread the needle with a manageable length of repair yarn. Starting a few stitches away from the hole, weave the yarn through several intact stitches on the wrong side. Change direction once or twice to anchor it without a bulky knot. If the throw has no obvious wrong side, choose the side you see least often. Keep the needle moving through the yarn strands rather than piercing and splitting them where you can.
Catch any loose loops at the edge so they cannot unravel further. Then work a loose outline through sound stitches around the hole, about one or two stitches back from the damaged edge. This outline gives the new strands something secure to hold. It should follow the shape of the opening without pulling it closed. Pause and flatten the fabric if you see the edges gathering.
Weave a new surface across the hole
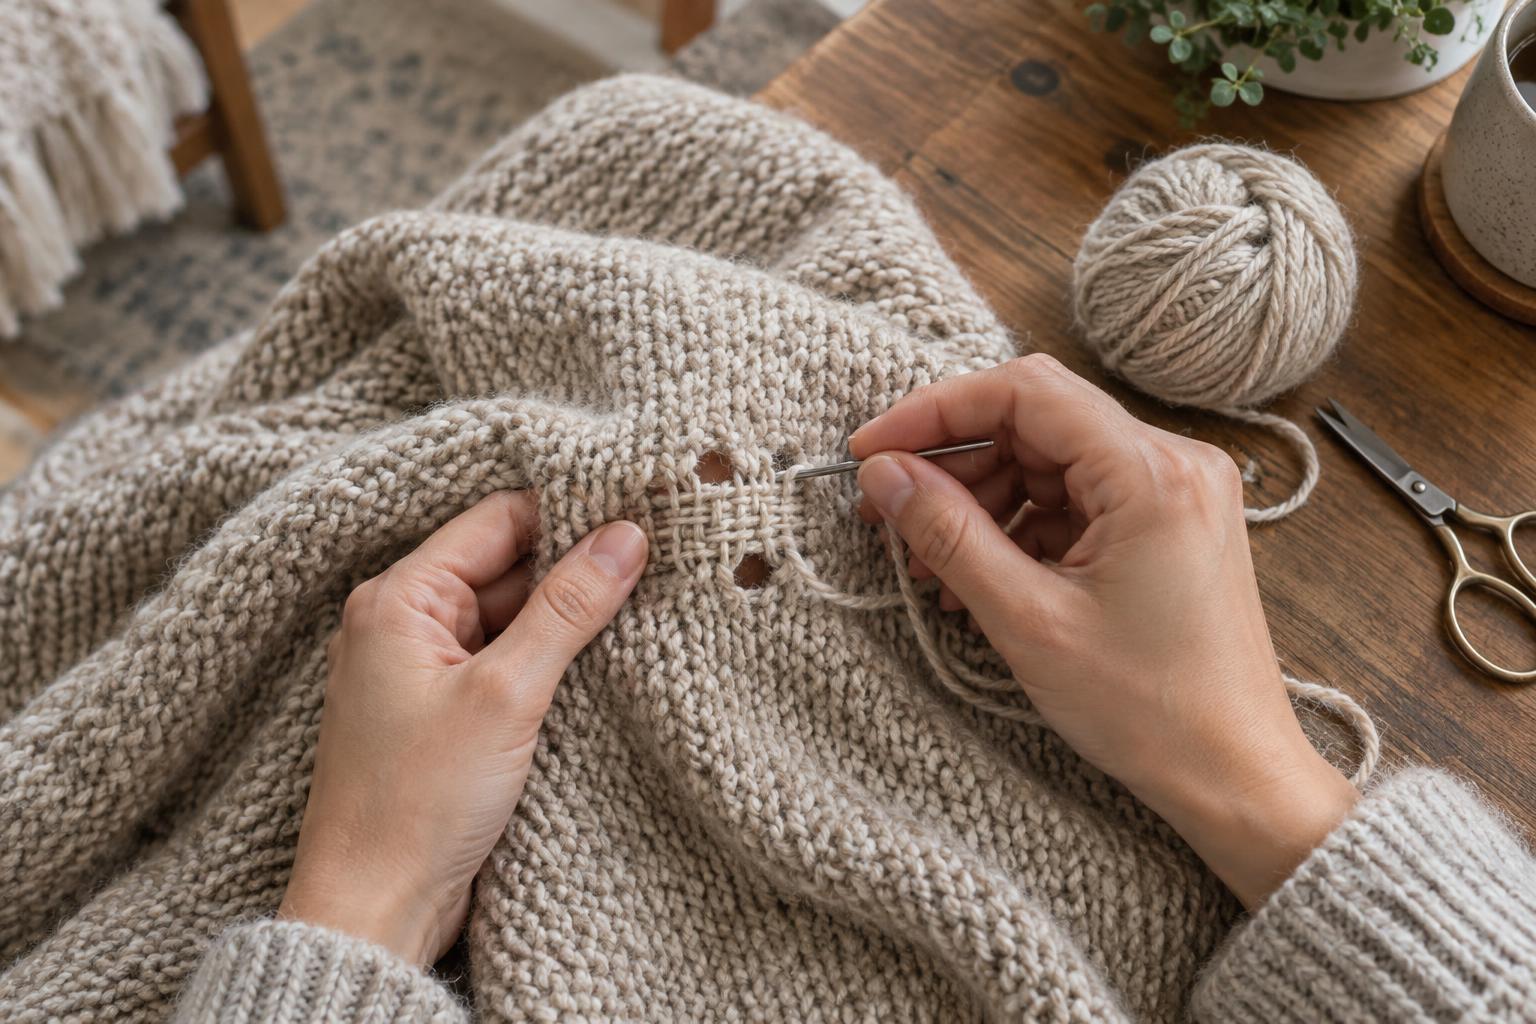
Carry the repair yarn across the opening in parallel passes, anchoring each pass in sound knitting beyond both sides of the hole. Space the passes close enough to cover the gap, but leave a little ease: knitted fabric moves, and a tight grid can feel stiff. At the end of each pass, turn the needle through a nearby intact stitch rather than wrapping the yarn tightly around the damaged edge.
Next, weave in the opposite direction, going over and under the strands you just laid. Catch a sound stitch at each end of the row before turning back. Alternate the over-under sequence on each row so the strands interlock. Use the needle tip to nudge them into place rather than pulling hard. When the opening is covered, gently smooth the throw on the table and check that the repaired area lies flat.
Finish the darn and care for the repair
Take the needle to the wrong side and weave the remaining yarn through several stitches, changing direction to hold the end. Trim it with a short tail rather than cutting flush against the fabric. Secure any original loose ends in the same way if they are long enough. Turn the throw over and inspect the repair from both sides. A good darn need not be invisible, but it should cover the hole without sharp loops that could catch on fingers or furniture.
Follow the throw’s usual care instructions after repairing it. Gentle handling during washing and drying helps avoid stressing the new strands, especially if the repair yarn behaves differently from the original. Check the darn after the first wash or a few uses. If a corner begins to lift, securing it while it is small is easier than rebuilding the whole repair.